Product Description
- Features
- Specifications
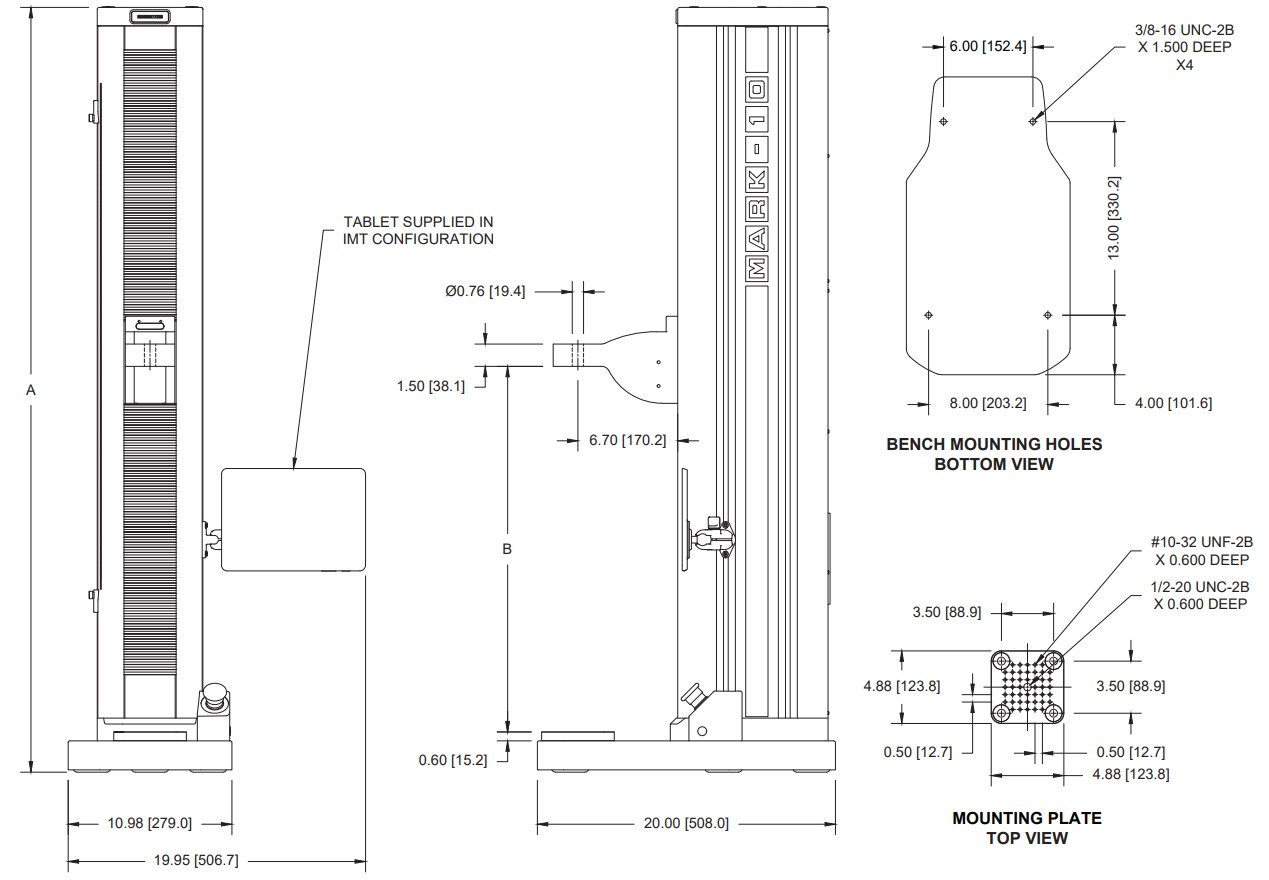
- Dimensions
- Accessories
- Downloads
- Calibration
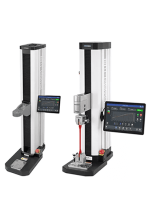
| Rigid and Precise By Design | Exceptionally rigid frames feature custom extrusion designs, engineered for stiffness. Factory compensation of test frames and force sensors ensure position accuracy of ± 0.002 in / 0.05 mm under any load, at any position. Stepper motors and controllers drive a ballscrew and linear guideway for smooth, quiet operation, with virtually no speed variation under load. |
| External Limit Switches | Solid-state upper and lower limit switches may be used as test limits or as test exceptions. Dual-graduated rulers aid in switch placement. |
| Easy-to-service Electronics | Most electronics are housed in an integrated module, easily replaced without special tools or processes. |
| IntelliMESUR | It is an integrated solution software running on Windows tablets and PCs. Select a pre-loaded 10.1” tablet with mounting bracket or use your own Windows device. With IntelliMESUR®, you can create and run a wide range of basic and multi-step tests, including: ○ Limit testing to a load, break, or distance ○ Height measurement ○ Load holding ○ Cycle testing ○ Multi-step testing, utilizing any combination of the above functions Run individual runs or batches, and view data in graphical format or results tables. Save or export data as needed, or generate a report. |
| Ready. Set. Go. | From IntelliMESUR®’s home screen, quickly access up to 10 favorite tests. Associate an image with each favorite for easy identification. |
| What’s your point of view? | Run a test via the Graph or Results views, and switch views as needed. Pass / Fail indicator easily identifies problematic samples. Individual runs may be invalidated if, for example, the sample slips out of the grips, or the test was interrupted. |
| Easy Test Setup | Select a test type, and IntelliMESUR® will guide you through the setup. Load Limit, Distance Limit, Break Limit, Load Hold, and Cycle. 1. Pre-Test Settings ○ Units of measurement ○ Batch size ○ Display preferences ○ Preload ○ Operator prompts 2. Test Settings ○ Test objective ○ Speed ○ Pass / fall limits ○ Exception limits 3. Results & Statistics Selection ○ Final load ○ Maximum load ○ Minimum load ○ Load at max. distance ○ Load at min. distance ○ Load at break ○ Average load ○ Delta load ○ Maximum distance ○ Final distance ○ Minimum distance ○ Height ○ Distance at max. load ○ Distance at min. load ○ Distance at break ○ Delta distance ○ Area under the curve |
| Multi-step tests | Building upon basic test wizards, easily incorporate any combination of steps, with the ability to loop a sequence of steps. Select from: ○ Move to load ○ Move to distance ○ Move to break ○ Hold a load or position ○ Hold a load or position ○ Loop / cycle ○ Datum ○ Prompts ○ Save current load or position ○ Zero load or position ○ Return to Home position |
| Operator Prompting | Prompts can appear at the beginning of each test, batch, or run. Ask prompts ask the operator for information which is saved in the results table – for example, a lot number. Type the response or use a barcode scanner. Tell prompts provide instructions to the operator, and can include an image. |
| Take your measurements to new heights | Use Height Mode to determine height at a specific load, commonly used in spring testing. A datum may be set to define the reference point. |
| Deflection Compensation | Series F test frames and force sensors are deflection-compensated at the factory, resulting in system distance measurement accuracy of ±0.002 in / 0.05 mm at any load and at any position along the frame. To further compensate grips and attachments, use IntelliMESUR®’s deflection compensation utility. The deflection offset file can be associated with the test setup file. |
| Robust Data Acquisition and Management | Blazingly fast: Force sensor sampling rate of 20,000 Hz yields accurate peak measurements even in quick-duration events. IntelliMESUR® collects load and travel data at up to 1,000 Hz, and allows up to 4 million data points per run. Customizable reporting: Print or create a PDF report, including results, statistics, graph, system and user information, and comments. Personalize the report with your company logo and an additional image. Create report templates to save with future reports. Save or export data: Automatically or manually save individual runs and results to a USB drive or file location of your choice. File names are automatically generated with the test name and time stamp, for quick searchability. Results sets and data from individual runs may also be exported as .csv files. |
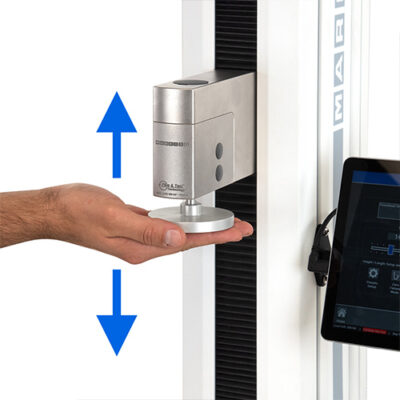
| Intelligent Manual Control | Manually control the test frame to obtain quick force and distance results, or manually position the crosshead prior to a test. Select from several actuation methods, including momentary (button-hold), maintained (button release) motion, jog mode with three distance presets, and FollowMe® force-based positioning.
Push and pull on the force sensor to move the crosshead. Apply greater force to achieve faster motion. FollowMe® is responsive enough for quick positioning as well as fine adjustments. The Height / Length Offset utility in Manual Control defines a reference point to accommodate applications in which grips cannot directly touch one another. |
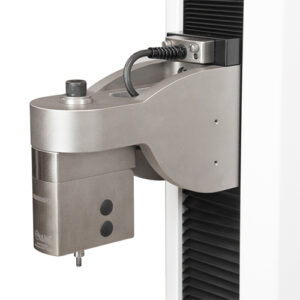
| Calibrate Force Sensors on the Test Frame or Off-site | Calibrate Series FS05 and R07 force sensors in one of two ways: Test frame: IntelliMESUR® provides an integrated utility, with an intuitive step-by-step wizard. Manual controls allow the technician to use the test frame to apply tension and compression forces. Off-site: Conveniently remove the force sensors for off-site calibration with a Mark-10 Model M7I or M5I indicator (requires optional AC1083 adapter). |
| Secure User Access | Control user access with three permissions levels: ○ Administrators have full access. ○ Supervisors can create a test, run reports, calibrate force sensors, and change settings. ○ Operators may recall and run a test, but cannot create a test or perform more advanced functions. |
| System Requirements | ○ Windows 10 or later operating system ○ Minimum 4GB RAM ○ Minimum monitor resolution of 1310 x 885 ○ Minimum of two USB ports (one for a license dongle, one for a cable to the test frame) |
| Load Capacity | 1500 lbf , 6.7 kN |
| Maximum Travel | 813 mm , 32″ |
| Speed Range | (0.02 to 1,800) mm/min , (0.001 to 70) in/min |
| Load Accuracy (% of full scale) | Test frame + force sensor, calibrated together: ± 0.1% Test frame: ± 0.1% Force sensor alone: Series FS05: ± 0.1% , Series R07: ± 0.15% |
| Speed Setting Accuracy: | ± 0.2% |
| Load Sampling Rate | 20,000 Hz |
| Data Acquisition Rate | 1,000 Hz |
| Speed Accuracy | ± 0%, stepper motor driven |
| Distance Accuracy | ± 0.05 mm , 0.002″, factory-compensated at up to full load |
| Distance Resolution | 0.01 mm , 0.0005″ |
| Limit Switch Repeatability | 0.03 mm , 0.001″ |
| Power | Universal input 100-240 VAC, 50/60 Hz, 450W |
| Fuse Type | 4A, 3AG, SLO BLO |
| Weight (test frame only) | 89 kg , 197 lb |
| Shipping Weight | 247 kg , 122 lb |
| Environmental Conditions | Indoor use only Up to 6,500 ft , 2,000 m above sea level Temperature range: (5 to 35)°C , (40 to 95)°F Humidity range: up to 80% relative humidity at 31°C, decreasing linearly to 50% relative humidity at 40°C, non-condensing Mains supply voltage fluctuations up to ± 10% of the nominal voltage Transient overvoltages up to the levels of Overvoltage Category II Use in environments up to Pollution Degree 2 |
| Conformance | CE |
| Manufacturer’s Warranty | 3 years (see individual statement for further details) |

| Model | A | B |
| F750 , F1500 | 51.35″ , 1304.3 mm | (8.125 to 40.125)” , (206.4 to 1019.2) mm |
| F750S , F1500S | 33.89″ , 860.9 mm | (8.125 to 22.33)” , (206.4 to 567.1) mm |
| In the Box |
| (1) Control panel, mounting bracket, and hardware |
| (1) USB cable |
| (1) Eye end kit for base. Includes: (1) eye end, (1) anchor pin, (2) lock rings |
| (2) Spanner wrench |
| (1) Power cord |
| (1) Allen wrench set |
| Optional Force Sensors – Series R07 | lbf | ozf | gf | kgf | N | kN |
| MR07-50 | 50 x 0.02 lbf | 800 x 0.5 ozf | 25000 x 10 gf | 25 x 0.01 kgf | 250 x 0.1 N | |
| MR07-100 | 100 x 0.05 lbf | 1600 x 1 ozf | 50000 x 20 gf | 50 x 0.02 kgf | 500 x 0.2 N | |
| MR07-200 | 200 x 0.1 lbf | 3200 x 2 ozf | 100 x 0.05 kgf | 1000 x 0.5 N | 1 x 0.0005 kN | |
| MR07-300 | 300 x 0.2 lbf | 4800 x 5 ozf | 150 x 0.1 kgf | 1500 x 1 N | 1.5 x 0.001 kN | |
| MR07-500 | 500 x 0.2 lbf | 8000 x 5 ozf | 250 x 0.1 kgf | 2500 x 1 N | 2.5 x 0.001 kN | |
| MR07-700 | 750 x 0.5 lbf | 12000 x 10 ozf | 375 x 0.2 kgf | 3750 x 2 N | 3.75 x 0.002 kN | |
| MR07-1000 | 1000 x 0.5 lbf | 16000 x 10 ozf | 500 x 0.2 kgf | 5000 x 2 N | 5 x 0.002 kN | |
| MR07-1000 | 1500 x 1 lbf | 24000 x 20 ozf | 750 x 0.5 kgf | 7500 x 5 N | 7.5 x 0.005 kN |
| Optional Force Sensors – Series FS05 | lbf | ozf | gf | kgf | N | kN | mN |
| FS05-012 | 0.12 x 0.00005 lbf | 2 x 0.001 ozf | 50 gf | 0.5 x 0.0002 N | 500 x 0.2 mN | ||
| FS05-025 | 0.25 x 0.0001 lbf | 4 x 0.002 ozf | 100 x 0.05 gf | 1 x 0.0005 N | 1000 x 0.5 mN | ||
| FS05-05 | 0.5 x 0.0002 lbf | 8 x 0.005 ozf | 250 x 0.1 gf | 2.5 x 0.001N | 2500 x 1 mN | ||
| FS05-2 | 2 x 0.001 lbf | 32 x 0.02 ozf | 1000 x 0.5 gf | 1 x 0.0005 kgf | 10 x 0.005 N | ||
| FS05-5 | 5 x 0.002 lbf | 80 x 0.05 ozf | 2500 x 1 gf | 2.5 x 0.001 kgf | 25 x 0.01 N | ||
| FS05-10 | 10 x 0.005 lbf | 160 x 0.1 ozf | 5000 x 2 gf | 5 x 0.002 kgf | 50 x 0.02 N | ||
| FS05-20 | 20 x 0.01 lbf | 320 x 0.2 ozf | 10000 x 5 gf | 10 x 0.005 kgf | 100 x 0.05 N | ||
| FS05-50 | 50 x 0.02 lbf | 800 x 0.5 ozf | 25000 x 10 gf | 25 x 0.01 kgf | 250 x 0.1 N | ||
| FS05-100 | 100 x 0.05 lbf | 1600 x 1 ozf | 50000 x 20 gf | 50 x 0.02 kgf | 500 x 0.2 N | ||
| FS05-200 | 200 x 0.1 lbf | 3200 x 2 ozf | 100 x 0.05 kgf | 1000 x 0.5 N | 1 x 0.0005 kN | ||
| FS05-300 | 300 x 0.1 lbf | 4800 x 2 ozf | 150 x 0.05 kgf | 1500 x 0.5 N | 1.5 x 0.0005 kN | ||
| FS05-500 | 500 x 0.2 lbf | 8000 x 5 ozf | 250 x 0.1 kgf | 2500 x 1 N | 2.5 x 0.001 kN |
| Optional Equipment | |
| Safety Shield (AC1092-1, AC1092-2) | Provides pinch and sample debris protection for the operator. Includes an electrical interlock, preventing test stand operation while the door is open. |
| USB Hub (AC1093) | Test frame-mounted 4-port USB hub improves cable management and conveniently accommodates peripherals, such as a flash drive, barcode scanner, etc. Compatible with all Series F test frames. |
| Eye end Adapters | Allow for quick grip installation and removal, and prevent grip rotation. Mount to common test frames, load cells, and force gauges. |
| Third-party Sensor Adapter (PTAF) | Adapt a third-party party force sensor to Series F frames and Models M5I and M7I indicators. |
○ A Certificate of Calibration is included when calibration services are ordered from MRM Metrology Inc.
○ Use CAL F1505S-IMT when requesting calibration services from MRM Metrology.
Calibration and Repair Services
MRM provides Calibration and Repair Services for the
F1505S-IMT Mark-10 Motorized Test Frame
For a quote, please email us at [email protected]









Reviews
There are no reviews yet.